Update: The original version of this post was written when the dotnet toolchain was built on top of the project.json based project structure. Since then the project.json was deprecated, and .NET Core moved to a csproj-based approach.
Because the project.json was completely deprecated, I decided not to write a new post, but simply adjust this one to work with the new toolchain (as of writing, that is dotnet 1.1).
Unit test coverage is an interesting metric. It’s not necessarily the most important one, and can be a bit misleading, but it gives at least an indication about how well our test suite covers our code base.
100% unit tests coverage is often a stretch, and can require a huge amount of extra work. Over 90% we often hit the point of diminishing returns, and have to jump over lots of extra hoops to get those last couple of percents covered.
Nevertheless, it’s nice to keep the coverage reasonably high, I usually try to aim at keeping it over 90%. This ensures that most of the code are exercised during a test run, and that the majority of our components are loosely coupled, and are able to be isolated from their dependencies.
I find it particularly handy to keep an eye on the change to the coverage caused by pull requests, and the gamification aspect of it is extra motivation for the devs to keep it high.
As far as I can tell, the test coverage situation in .NET Core is not really established at this point. The .NET coverage tools don’t have support for Core projects yet.
The only one I could find which works today is OpenCover. In this post I’ll cover setting up coverage generation with it and uploading it to Coveralls.
Since OpenCover doesn’t officially support .NET Core either, take everything in this post with a grain of salt, it definitely has the Works on My Machine™ badge, there is no guarantee the approach documented here won’t break with an update to either .NET or OpenCover.
Generating coverage
One significant limitation of OpenCover at this point is that it can only be used on Windows. This is problematic if our ecosystem (the developer machines and build agents) are completely Linux- or Mac-based. In this case we’ll have to wait until OpenCover (or any other coverage tool) starts supporting Linux.
On the other hand, if we are on Windows, coverage reporting already works nicely, although there are some gotchas we have to watch out for.
To give credits where it’s due: I’m not the first one getting this to work. I based my solution on the build script used by the .NET SDK of the Google Cloud Platform.
To generate the coverage for a particular test project we have to issue a single command with the OpenCover CLI (Assuming all the project dependencies have already been restored).
$OPENCOVER \
  -target:"c:\Program Files\dotnet\dotnet.exe" \
  -targetargs:"test -f netcoreapp1.0 -c Release test/MyProject.UnitTests/MyProject.UnitTests.csproj" \
  -mergeoutput \
  -hideskipped:File \
  -output:coverage/coverage.xml \
  -oldStyle \
  -filter:"+[MyProject*]* -[MyProject.UnitTests*]*" \
  -searchdirs:test/MyProject.UnitTests/bin/Release/netcoreapp1.0 \
  -register:user
-targetand-targetargs: These flags specify the operation which is executed, during which OpenCover collects the coverage statistics. In this case we specify executing the tests in our unit test project. (With a quick search I didn’t find any recommendation about whether to use a Debug or a Release build, so I’m using Release, as it is done in google-cloud-dotnet.) It’s important to explicitly specify the framework we’re using, so we can reliably set the binary output folder in the-searchdirsargument. We don’t necessarily have to usenetcoreapp1.0,net451works as well. (I haven’t tried other flavors.)-output: The path to the generated output file.-searchdirs: We have to exactly specify the binary output folder of our test project. Keep in mind that the exact path is affected by the build configuration and the framework we’re using. For example, in case ofnet451, instead of/netcoreapp1.0/we would have something like/net451/win7-x64/in the path.-filter: This argument is important, it specifies which projects we want to include in the report, and which ones we exclude. The documentation contains the details, but the pattern+[MyProject*]* -[MyProject.UnitTests*]*is enough to get started. It makes everything under MyProject included, and excludes the code under the test project.-mergeoutput, -hideskipped, -oldStyle, -register: I didn’t investigate too much in detail about these flags, I just copied them over from google-cloud-dotnet. Although I tried to remove them to make my script a bit simpler, but removing any of them made the coverage generation fail with various errors.
OpenCover saves the coverage into the specified XML file, which can the be used to generate an HTML report, and to upload the data to Coveralls.
Note: There is one gotcha I was fighting with for a while. If we don’t have the DebugType element in our csproj defined (as it is not in the template that dotnet new generates), then the coverage generation will fail with an error saying that the Pdb file is missing.
We can fix this by adding this element and setting its value to Full.
<DebugType>full</DebugType>
Creating an HTML report
There is a simple tool for generating an HTML report from the OpenCover called ReportGenerator. If we execute measuring the coverage in our CI pipeline, we can upload this report somewhere so we can freely analyze it.
If we upload the results to Coveralls, then this HTML report becomes less important, since we’ll be browsing the report mostly on the Coveralls site, but it can still come handy if we want to generate the report locally, which is particularly useful if we are on a branch that we haven’t pushed yet.
Assuming the coverage result was saved to coverage/coverage.xml, the following command will generate the HTML report.
ReportGenerator.exe \
  -reports:coverage/coverage.xml \
  -targetdir:coverage \
  -verbosity:Error
It’ll output a bunch of HTML content, and we can browse the coverage by opening index.htm.
Uploading to Coveralls
Coveralls is a service for collecting and tracking code coverage history and making it available through a web interface.
Luckily it’s free of charge for any open source project, and it can process the XML output format of OpenCover.
We can upload our previously generated report with the following command.
csmacnz.Coveralls.exe --opencover -i coverage/coverage.xml --useRelativePaths
In order for the command to work, the COVERALLS_REPO_TOKEN environment variable has to be set to contain the access token, which we can grab from the Coveralls website.
The full script
You can look at the full script for coverage generation in the repository of Stubbery, a library I’ve been working on for stubbing api dependencies. The script installs the necessary CLI tools at the beginning, so we can execute it both on the developer machines and on the agents without pre-installing anything.
And there is a separate script for doing the coveralls report, but that’s literally the single command I’ve shown above.
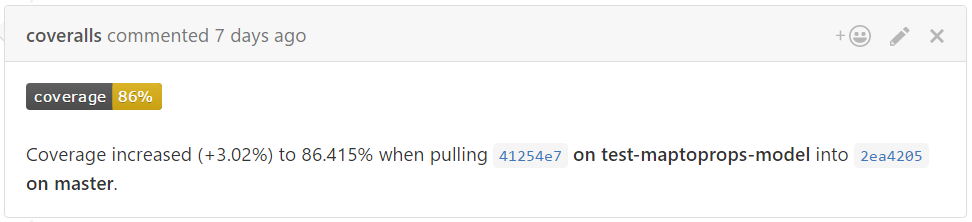
Currently I set up the AppVeyor config file so that the build and the coverage generation is executed only on commits to the master branch. It’s also possible to set up the agents in a way that the coverage report runs on every branch. This is particularly nice, because Coveralls can leave a comment on the PR telling how the coverage changed.
When I’ll have some more time, I want to look into how this can be set up with AppVeyor, and I’ll update this post.
The last thing to do is to grab the badge from our Coveralls page, and add it to our README.
With that we can either proudly demonstrate how well we’re doing, or motivate us to increase the coverage even further. Happy testing! :)