The first part of my series about jumstarting F# web development takes a look at probably the most straightforward-looking approach: write F# code using ASP.NET on the classic (full) .NET Framework. (If you’re not familiar with the distinction between the full .NET and .NET Core, you can read about it here.)
Traditionally, the ASP.NET development workflow has been a very streamlined and convenient experience. If we’re using C# and develop web applications with ASP.NET, we’re used to the fact that evereything is straightforward and nicely integrated into Visual Studio, and most of the features also have GUI support.
If we choose F# as our programming language, we’ll have to jump over some extra hoops to get Visual Studio and ASP.NET obey our bidding, and have to be prepared that some IDE features might not work properly.
Project type
The first initial problem is that there is no built-in project type in Visual Studio for ASP.NET and F#.
On the other hand, we need Visual Studio, and we need it to know about ASP.NET to get the support we need for ASP.NET development, such as publishing and integration with IIS (Express).
Although VS doesn’t have a built-in template for this purpose, it is possible to massage a csproj and change some GUIDs around until Visual Studio will handle it as an ASP.NET web application.
Mark Seeman has described this process in detail.
Luckily we don’t have to do this manually any more, because actual project templates have been added to the VS marketplace.
We have to install the following two templates.
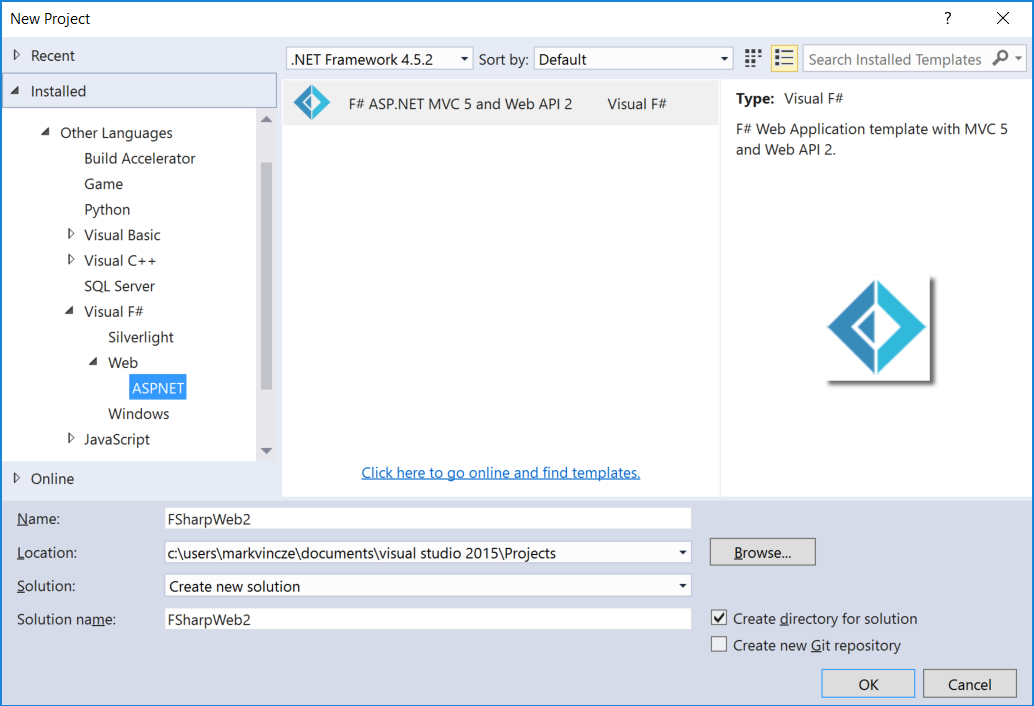
Now we can go ahead and create our project, we can select the project type “F# ASP.NET MVC 5 and Web API 2”.
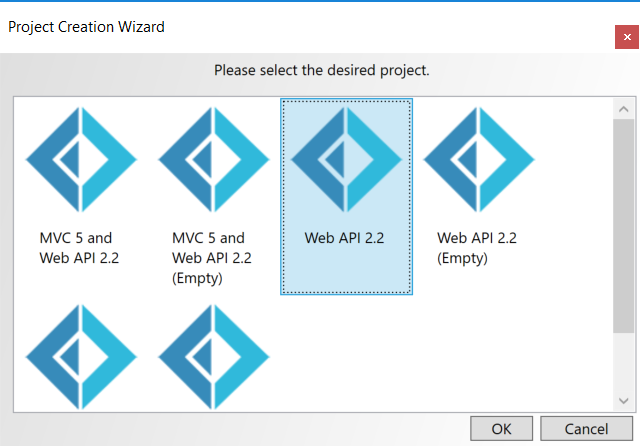
Then we can select the kind of ASP.NET project we’d like to have. If we want to develop an API, and not an HTML web site, we can select “Web Api 2”.
The template adds all the necessary files to our project.
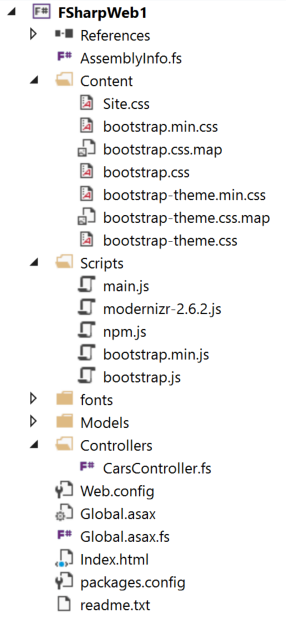
It also adds an Index.html welcome page, and a Content, Script and Fonts folder.
If you don’t need this, feel free to delete them, the Api itself will still work.
Basic ASP.NET elements
In order to get a classic ASP.NET api up and running, at minimum we’ll need the Global type and a controller.
This is what a minimal Global.asax.fs looks like.
namespace FSharpWeb

open System
open System.Web.Http

type HttpRouteDefaults = { Controller : string; Id : obj }

type Global() =
    inherit System.Web.HttpApplication()
    member this.Application_Start (sender : obj) (e : EventArgs) =
        GlobalConfiguration.Configuration.Routes.MapHttpRoute(
            "DefaultAPI",
            "{controller}/{id}",
            { Controller = "Home"; Id = RouteParameter.Optional }) |> ignore
And implementing a simple controller in F# can be done like this.
namespace FSharpWeb
open System
open System.Web.Http

type HomeController() =
    inherit ApiController()
    member this.Get() =
        this.Ok "Hello from F#!"
Fix serialization
We have two main ways to implement our data models on the Web Api boundary: we can either implement them as .NET classes, or we can use F# record types. I think the latter is the generally recommended approach, since it’s a more idiomatic construct in the F# world, and it requires less code.
You can find more details about it in this blog post.
Either way, to get serialization working properly, it’s important to have these two lines in our Global.asax.fs.
GlobalConfiguration.Configuration.Formatters.XmlFormatter.UseXmlSerializer <- true
GlobalConfiguration.Configuration.Formatters.JsonFormatter.SerializerSettings.ContractResolver <- Newtonsoft.Json.Serialization.CamelCasePropertyNamesContractResolver()
The first line switches from the DataContractSerializer to XmlSerializer for the case when we want to return our responses in XML, and the second line configures a specific contract resolver for Json.NET.
The reason we need them is to ensure we have correct property names in our responses. Without these configurations, the names would be somewhat garbled, which is caused by the property names that the F# compiler generates for record types in the background.
Add new items to the project
Even if we use these project templates, Visual Studio is still somewhat confused about having F# and ASP.NET together, and it doesn’t allow you to add any items (for example source files) to the project. (The Add New Item dialog is empty.)
This can be fixed by editing an entry in the registry. (This is supposed to be automatically done by a NuGet package which is present in the template, however, that didn’t work for me with Visual Studio 2015. I suspect that it only works for earlier versions of VS.)
To fix this, do the following steps.
- Open regedit
- Go to
HKEY_CURRENT_USER\SOFTWARE\Microsoft\VisualStudio\14.0_Config\Projects\ - Find
{349C5851-65DF-11DA-9384-00065B846F21}, the one which has a child calledLanguageTemplates. - Add a new String Value to
LanguageTemplateswith the key and value{F2A71F9B-5D33-465A-A702-920D77279786}. (It’s important to have the curly braces around the Guid!)
(Source: http://bloggemdano.blogspot.nl/2013/11/adding-new-items-to-pure-f-aspnet.html)
After restarting Visual Studio, we’ll be able to add items to our F# web projects as normal.
With these steps we have a working ASP.NET application written in F#.
In the next part of the series we’ll take a look at how to get started with Suave.IO on classic .NET.